How to configure new ZFS pool for backing up VM's Step-by-step
Guides
Configure the pool to be usable for backups
- Create a parent datasets with:
zfs create
/DATASET_NAME
Example: zfs create ProxmoxStorage/backup
- Create new directory in mnt to mount/link the dataset to the directory level.
mkdir /mnt/FRIENDLY_DIRECTORY_NAME
Example: mkdir /mnt/backups
- Direct the zfs pool on where to mount the pool on the filesystem,
zfs create POOL_NAME/DATASET_NAME/FRIENDLY_VM_NAME -o mountpoint=/mnt/vm_backups/FRIENDLY_VM_NAME.
Example: zfs create ProxmoxStorage/backup/Windows11 -o mountpoint=/mnt/backups/Windows11
- Check status of datasets with
zfs list
Output:
root@vm:~# zfs list
NAME                              USED  AVAIL  REFER  MOUNTPOINT
ProxmoxStorage                    924K  14.4T    96K  /ProxmoxStorage
ProxmoxStorage/backup             192K  14.4T    96K  /ProxmoxStorage/backup
ProxmoxStorage/backup/Windows11    96K  14.4T    96K  /mnt/backups/Windows11
rpool                            30.8G   399G   104K  /rpool
rpool/ROOT                       1.68G   399G    96K  /rpool/ROOT
rpool/ROOT/pve-1                 1.68G   399G  1.68G  /
rpool/data                       18.5G   399G    96K  /rpool/data
rpool/data/vm-101-disk-0           80K   399G    80K  -
rpool/data/vm-101-disk-1         3.71G   399G  3.71G  -
rpool/data/vm-102-disk-0          124K   399G   124K  -
rpool/data/vm-102-disk-1         14.8G   399G  14.8G  -
rpool/data/vm-102-disk-2           64K   399G    64K  -
rpool/var-lib-vz                 10.5G   399G  10.5G  /var/lib/vz
root@vm:~#
-
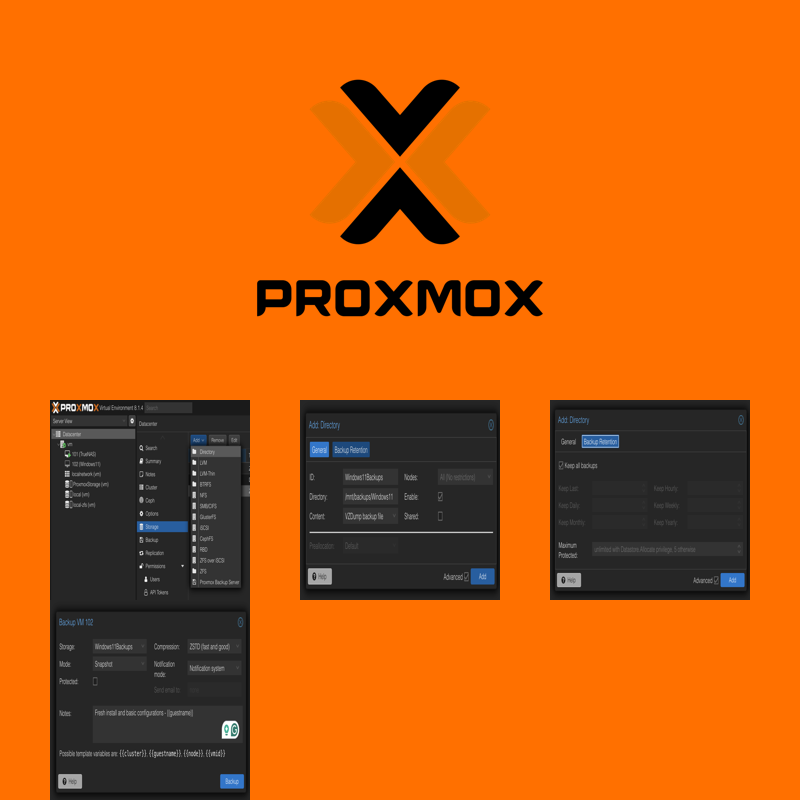
Go to Datacenter > Storage > Add > Directory

-
Fill out the form:
ID: A friendly name, like 'Windows11Backups'. Directory: where our dataset is mounted on the system, e.g: /mnt/backups/Windows11 Content: The type of content to be housed, for backups it is VZDump backup file


-
Click Add
-
Navigate to the VM to click on the Backup menu
-
Click Backup Now and fill out the form
Storage: Where we should store the backup, our newly created link should now be visable here.
